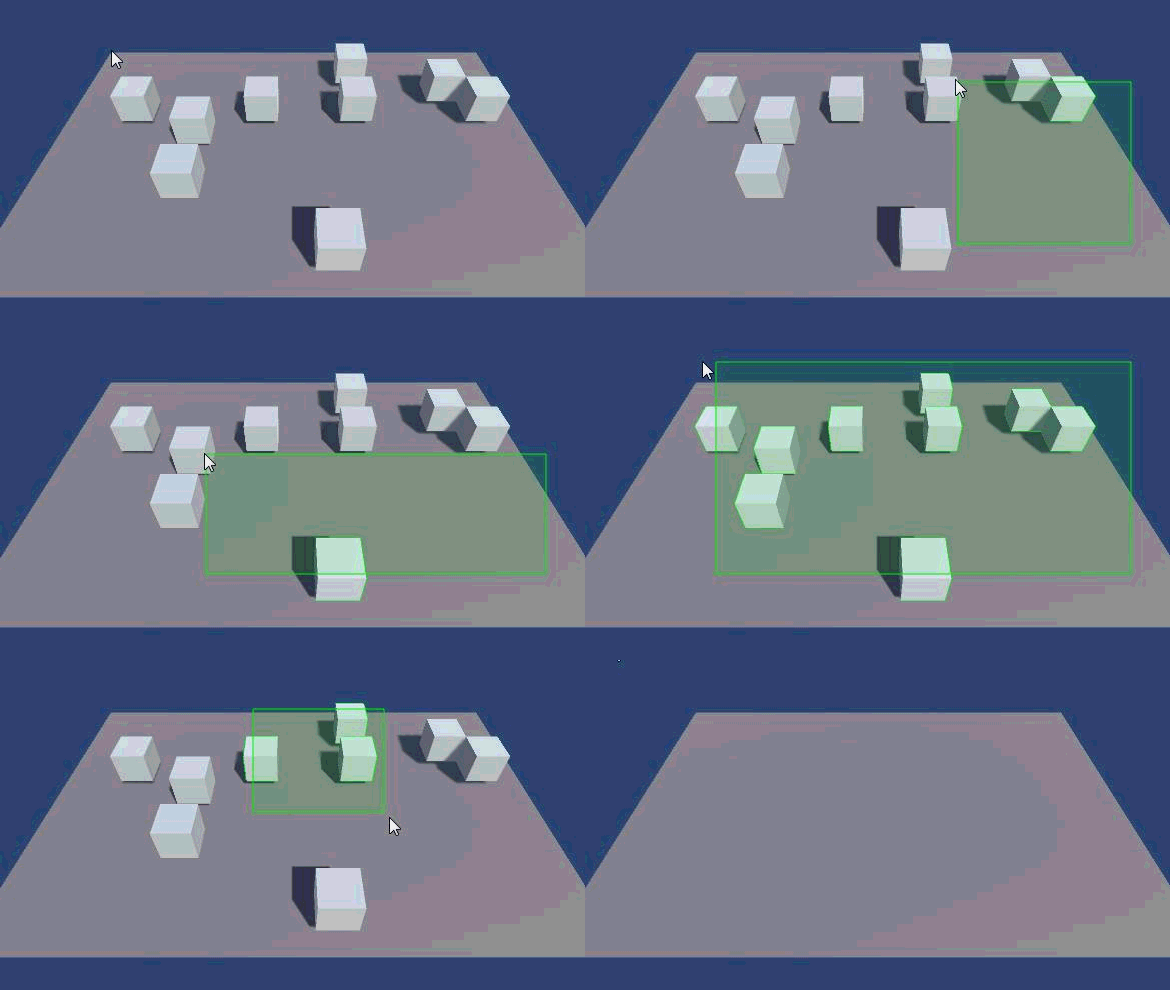
实现类似红警和星际争霸的框选功能
发表于2017-09-30


这里我们来实现类似红警和星际争霸的框选功能
实现画线
using UnityEngine;
public class DrawRect : MonoBehaviour {
    bool drawing = false;
    private Material rectMat;
    private Color rectColor = Color.green;
    private Vector2 startPosition = Vector2.zero;
    private Vector2 endPosition = Vector2.zero;
    void Start()
    {
        rectMat = new Material( Shader.Find( "Lines/Colored_Blended" ) );
    }
    void Update()
    {
        if (Input.GetMouseButtonDown(0))
        {
            drawing = true;
            startPosition = Input.mousePosition;    // 设置开始位置
            CubeManager.Instance.BeginDraw();
        }
        else if ( Input.GetMouseButtonUp( 0 ) )
        {
            drawing = false;
            CubeManager.Instance.EndDraw();
        }
    }
    void OnPostRender()     // 该方法为系统函数,需将此脚本挂载到Camera下才能执行。
    {
        if ( drawing )
        {
            GL.PushMatrix();
            if ( !rectMat )
                return;
            endPosition = Input.mousePosition;      // 设置结束位置
            CubeManager.Instance.Drawing( startPosition, endPosition );
            rectMat.SetPass( 0 );
            GL.LoadPixelMatrix();
            GL.Begin( GL.QUADS );
            GL.Color( new Color( rectColor.r, rectColor.g, rectColor.b, 0.1f ) );
            GL.Vertex3( startPosition.x, startPosition.y, 0 );
            GL.Vertex3( endPosition.x, startPosition.y, 0 );
            GL.Vertex3( endPosition.x, endPosition.y, 0 );
            GL.Vertex3( startPosition.x, endPosition.y, 0 );
            GL.End();
            GL.Begin( GL.LINES );
            GL.Color( rectColor );
            GL.Vertex3( startPosition.x, startPosition.y, 0 );
            GL.Vertex3( endPosition.x, startPosition.y, 0 );
            GL.Vertex3( endPosition.x, startPosition.y, 0 );
            GL.Vertex3( endPosition.x, endPosition.y, 0 );
            GL.Vertex3( endPosition.x, endPosition.y, 0 );
            GL.Vertex3( startPosition.x, endPosition.y, 0 );
            GL.Vertex3( startPosition.x, endPosition.y, 0 );
            GL.Vertex3( startPosition.x, startPosition.y, 0 );
            GL.End();
            GL.PopMatrix();
        }
    }
}
生成物体,实现框选
using UnityEngine;
using System.Collections;
using System.Collections.Generic;
public class CubeManager : MonoBehaviour {
    private static CubeManager instance;
    public static CubeManager Instance
    {
        get
        {
            return instance;
        }
    }
    public GameObject prefab;
    public int count = 10;
    private Material originMat;
    private Material outlineMat;
    private List<MeshRenderer> meshRendererList;
    void Awake()
    {
        instance = this;
    }
	// Use this for initialization
    void Start () {
        meshRendererList = new List<MeshRenderer>();
        // 创建物体
        for ( int i = 0; i < count; i   )
	    {
            GameObject go = GameObject.Instantiate( prefab ) as GameObject;
            go.name = (i   1).ToString();
            go.transform.parent = transform;
            go.transform.position = new Vector3( Random.Range( -6, 7 ), 0, Random.Range( -4, 5 ) );
            meshRendererList.Add( go.GetComponent<MeshRenderer>() );
	    }
        originMat = meshRendererList[0].material;
        // 获取描边shader
        outlineMat = new Material( Shader.Find( "Outlined/Diffuse" ) );
        outlineMat.color = originMat.color;
        outlineMat.SetColor( "Outline Color", Color.green );
    }
    public void BeginDraw()
    {
        var item = meshRendererList.GetEnumerator();
        while ( item.MoveNext() )
        {
            item.Current.material = originMat;
        }
    }
    public void Drawing( Vector2 point1, Vector2 point2 )
    {
        Vector3 p1 = Vector3.zero;
        Vector3 p2 = Vector3.zero;
        if ( point1.x > point2.x )
        {
            p1.x = point2.x;
            p2.x = point1.x;
        }
        else
        {
            p1.x = point1.x;
            p2.x = point2.x;
        }
        if ( point1.y > point2.y )
        {
            p1.y = point2.y;
            p2.y = point1.y;
        }
        else
        {
            p1.y = point1.y;
            p2.y = point2.y;
        }
        var item = meshRendererList.GetEnumerator();
        while ( item.MoveNext() )
        {
            Vector3 position = Camera.main.WorldToScreenPoint( item.Current.transform.position );
            if ( position.x > p1.x && position.y > p1.y
                && position.x < p2.x && position.y < p2.y )
            {
                item.Current.material = outlineMat;
            }
            else
            {
                item.Current.material = originMat;
            }
        }
    }
    public void EndDraw()
    {
    }
}
项目使用版本:Unity5.3.6 GitHub下载地址:
